 Here is one way to start some seedlings of your own. Take a deli-type tray with an attached cover. Clean it up and then put down a layer of a porous starter mix.
Sprinkle some powdered sphagnum moss on the surface. This does a couple of things. One is that the sphagnum will hold a little bit of moisture around the VERY tiny seedlings. The second thing is that the sphagnum is supposed to prevent fungal problems and "damping-off" of the seedlings. At any rate, it can't hurt.

Dampen the surface of the mix slightly. The mix in the container is DAMP, but not wet, leaky, dripping, standing in water or otherwise soaked.

Put dividers in the container if you intend to try more than one variety of seed.
 Since the cover is attached to the box, you won't accidently mix up the orientation of the cover. What you write on it will reflect what sort of seed is directly underneath.
Take some white smooth paper like the sort that comes in the computer tray. Cut it generously and leave some room so that you can handle it without trouble. Fold it so that the seed will fall into the crease and line up so that you can gently tap them off where you wish to put them on the soil's surface.

This is what a small seed pod looks like. Gently twist to get the TINY seeds to fall onto the paper. Gesneriads produce copious amounts of minute seeds. Don't use too many, you don't want to grow out hundreds of the same variety of seed. Besides if something happens to this batch, you will have another chance to use more of the seed in the pod to try another time.

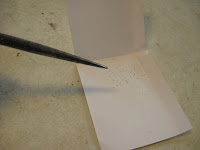
CLICK ON THE PHOTO to see the size of the tiny seed on this paper. The pointer is showing you the small black spots on the white paper. These are SEEDS not dirt.

After each different seed you put on the soil, write the information on the attached cover. The type, date, notes you might want to remember.....
 This is what a tray with six types of seed looks like. It's very inexpensive to do (free containers), easy and it doesn't take more than about 15 minutes to get the job done. Put the box under your plant lights or in a bright spot and check every couple of days. You will see green in probably a week to 10 days. Then we'll talk about what to do with the newest baby gesneriads.