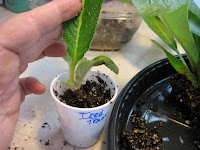
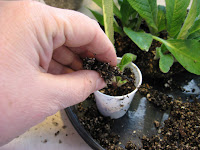
 This is how it's done! You take your clear seed starting container and your plant-room helper and you get down to work.
Take some time to get the proper gear together such as your tools, potting mix, markers and pots and watering container. Make sure everything is clean.


Label the containers - in this case 3 oz Dixie Cups - with a permanent marker. State the variety and the plant's name, the date and what ever information you want to remember. In two weeks you won't have a clue what plant was what, so ALWAYS label everything.
 Make holes in the pots. An easy way to do that is to take an awl and push it through two or three cups at the same time. Make holes in the sides also for best drainage and aeration.
Now if the seed-started plants are fairly mature as these in the picture are, lift up the plants carefully and take them out of their starter container.

Select one baby plant and carefully separate it from the bunch.

Put it in a separate labeled pot.

Gently put some extra soil around the roots and settle the soil down carefully.

Now you will note that your plant-room helper has some commentary on your job but the babies in the pots are ready to be put under some grow lights. See that the newly moved young plants are moist but not drowning and place them in a clean tray under the grow lights. Watch the plants carefully and don't let them dry and wilt. Now you have 48 new streps from seed, all with the potential to be "that one new, exciting, sensational new hybrid introduction" that now bears your name! Happy Growing
 .
.
No comments:
Post a Comment